It is often used to weave bracelets, necklaces, and belts, etc.
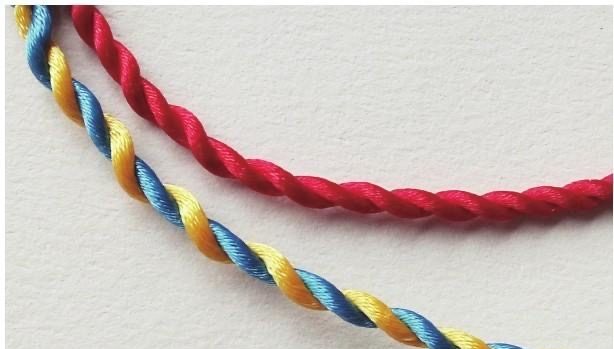
To make a two-strand braid, hold two strands of yarn between your thumb and forefinger and twist them in the same direction.
How to braid three strands?
Difficulty level: ★☆☆☆☆
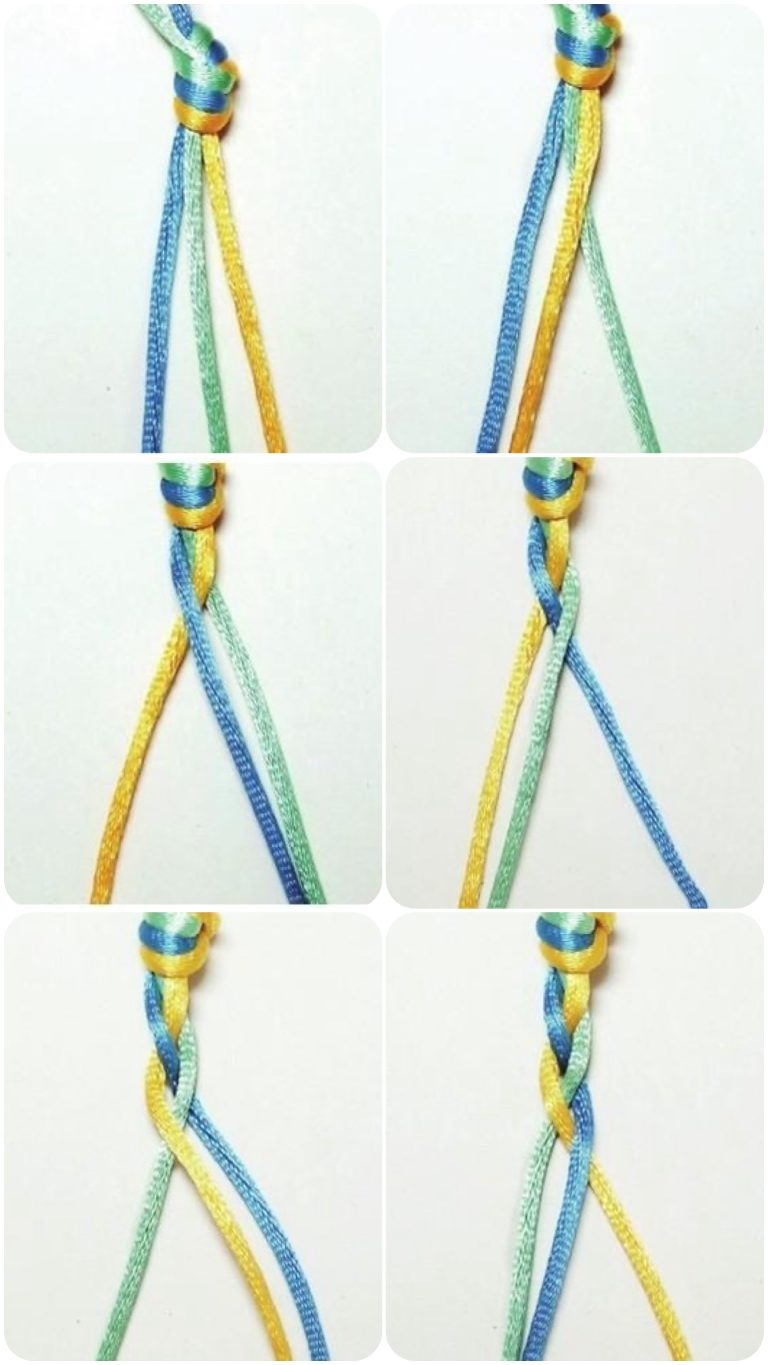
A three-strand braid, also known as a fishtail braid, is mainly made by crossing the lines on both sides. The trick to braiding a three-strand braid is to keep pushing the line on the side that is furthest back onto the middle line.
1. Braid 3 strands of hair together, tie a knot, and secure the top of the knot.
2. Push the yellow strand on the right side onto the green middle strand.
3. Push the blue strand on the left side onto the yellow middle strand.
4. Push the green strand on the right side onto the blue middle strand.
5. Push the yellow strand on the left side onto the green middle strand.
6. Repeat the process of pushing the strands to create a three-strand braid.
Diagram of Three-strand Braids
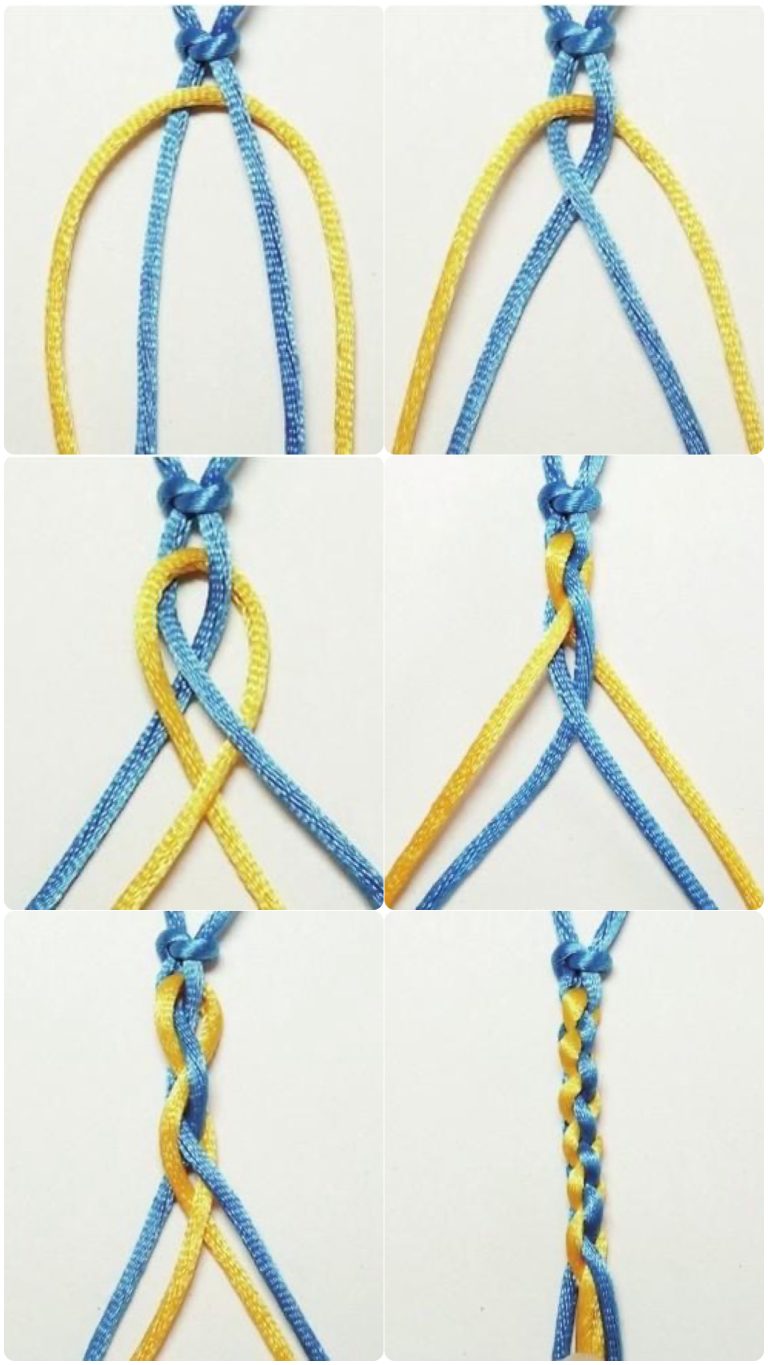
Diagram of Four-strand Braids
How to braid four strands?
Difficulty level: ★★☆☆☆
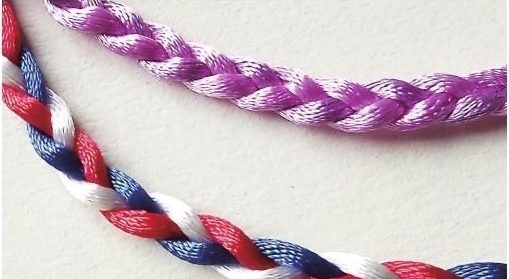
The four-strand braid is also known as the rotating knot, which is mainly made by alternately and rotatingly weaving four strands of thread. It is often used to make bracelets, necklaces, and anklets. When weaving, you can also divide the thread into four strands and number them. Start by 2 over 3 with the blue thread, then 4 over 1, 1 over 4, and repeat the process of pressing the thread.
1. Fold the blue thread in half and tie a knot. Fold the yellow thread in half and pass it through the center of the two blue threads. 2. Cross the blue thread, with the blue thread behind the yellow thread pressing on top of the thread in front. 3. Cross the yellow thread, with the yellow thread behind the blue thread pressing on top of the thread in front. 4. Cross the blue thread, with the blue thread behind the yellow thread pressing on top of the thread in front. 5. Cross the yellow thread, with the yellow thread behind the blue thread pressing on top of the thread in front. 6. The trick is to repeat the crossing of the same-colored threads, with the thread behind pressing on top of the thread in front when crossing.
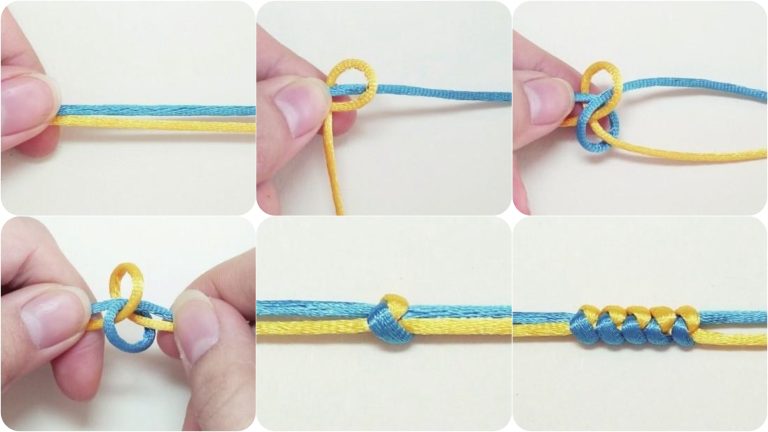
How to braid snake knots?
Difficulty level: ★☆☆☆☆
The Snake Knot is named after its texture that resembles a snake’s body. The texture of the Snake Knot is simple and elegant, and the knot has some elasticity, making it easy to loosen. The texture on both sides of the knot is the same.
1. Lay two strands side by side. 2. Wrap the lower yellow strand counterclockwise around the blue strand, fold it over and pull it down. 3. Wrap the upper blue strand clockwise around the yellow strand, and pass it through the yellow loop. 4. Pull both ends of the rope evenly to tighten the knot. 5. The Snake Knot is complete when the rope is tightened. 6. Repeat steps 2-4 until you have a Snake Knot of the desired length.